
Translate App Store screenshots.
Match the style. Review the layout. New language.
Upload one finished App Store or Google Play screenshot, enter the caption to translate, and choose one supported language. Review the translated image and download it before repeating the process for another caption or locale. No source design file is needed. Check the output dimensions and the accuracy of the app claims before submitting it to a store.
The model translates the phrase you enter, then repaints it. Check meaning, spelling and line breaks before publishing.
No credit card required to start. Sign in for a free edit.
By clicking Generate, you confirm you own or are licensed to edit this image and that the edit is not intended to deceive a third party — including fake refund or transaction proofs and email or chat screenshots altered to falsify sender, content, or timestamp.
We do not process IDs, passports, certificates, bank records, receipts, payment proofs or chat screenshots. See our Acceptable Use Policy.
To translate App Store screenshots, upload one finished screenshot, enter a caption exactly as it appears and choose a supported target language. The AI attempts to translate that phrase while matching its style. Repeat for other captions or screenshots, and inspect the output dimensions and wording before submitting it to App Store Connect or Google Play Console.
Three ways teams translate App Store screenshots.
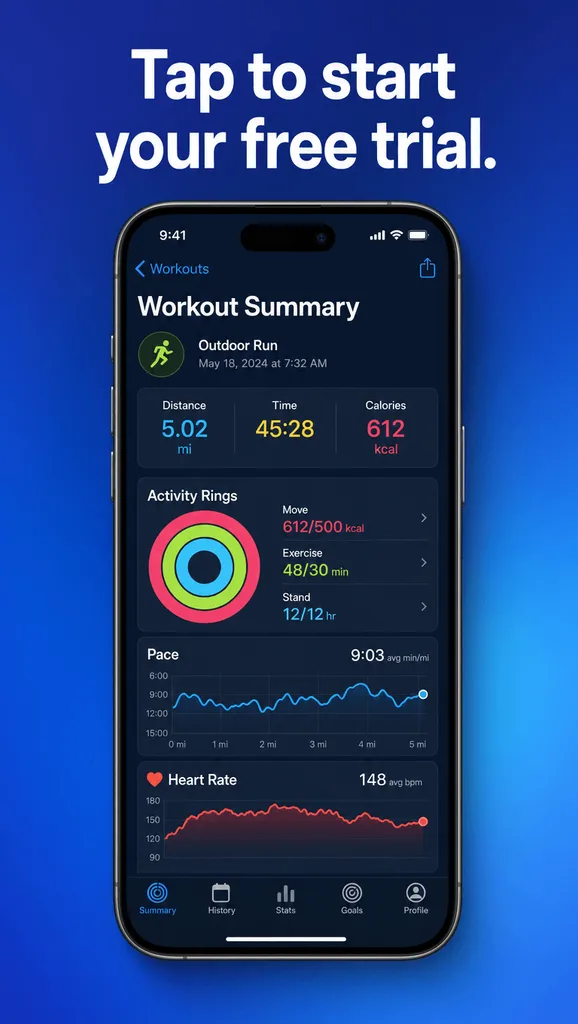
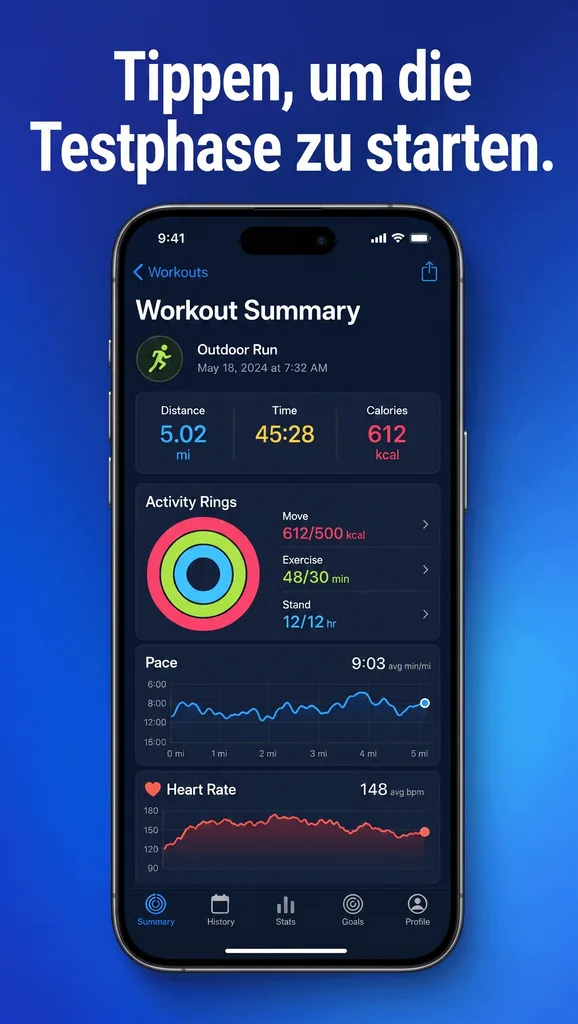
Localization jobs where the design source is gone or beside the point — you have the finished screenshots and just need them in more languages, fast.
 Before
 After
Translate App Store screenshots one by one — into five locales, without the source file
You have finished English screenshots and need localized captions, but the original Figma file is unavailable. Upload one screen, enter one visible caption, choose a supported language and review the result. Repeat for the remaining captions and languages. Each run costs 1 credit; there is no multi-image batch or ZIP export. Organize the downloaded images yourself, and verify dimensions, UI accuracy and translated wording against the current store requirements.
 Before
 After
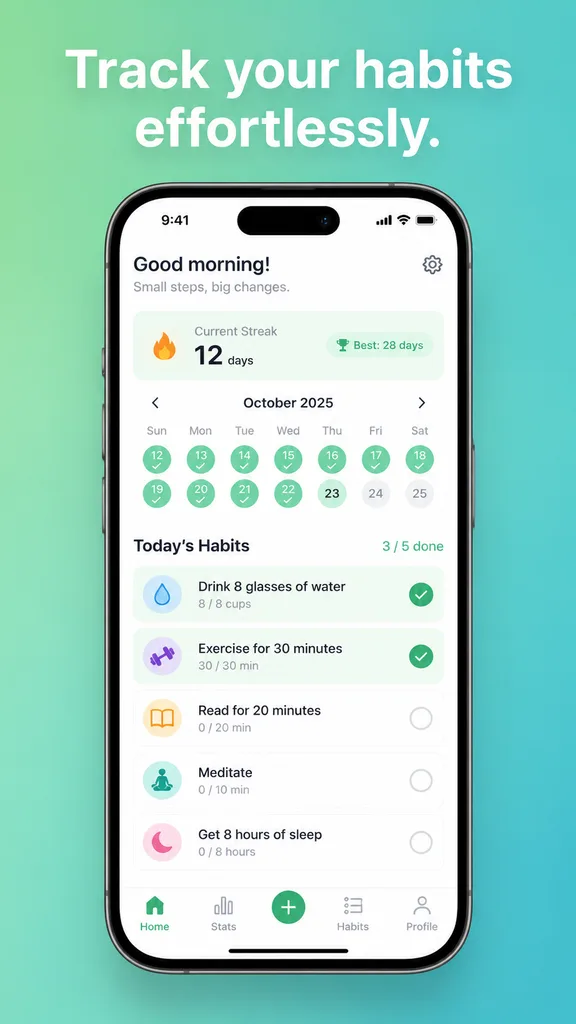
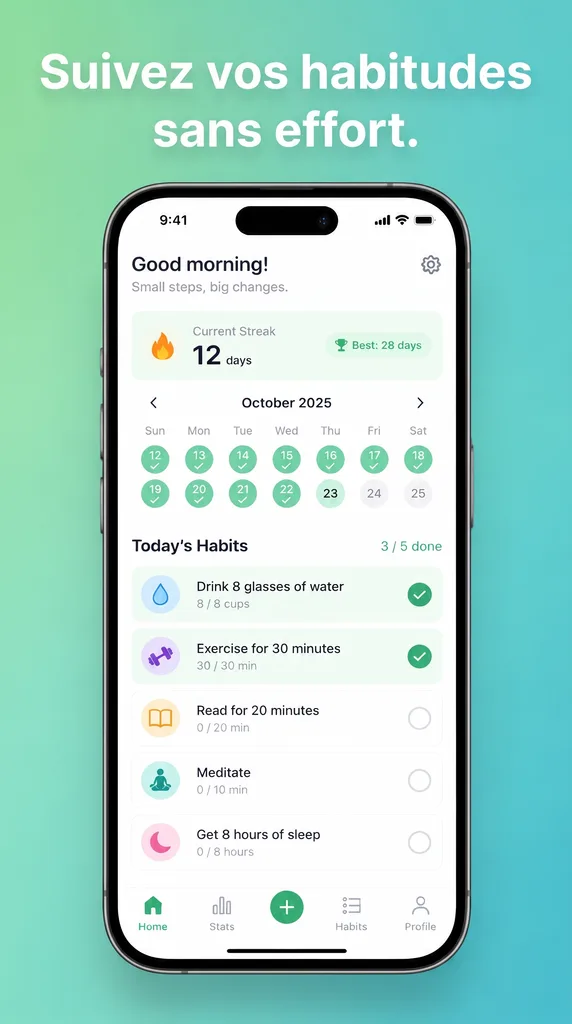
Re-localize App Store screenshots after a copy change — no full rebuild
A stronger English headline needs to be reflected in several localized screenshots. Work from the finished image: enter the caption you want to translate, choose one supported language and generate. Review the new wording along with the device frame, feature callouts and background, then download. Repeat for another caption or language. This avoids reopening the source layout, but surrounding details and dimensions still need checking.
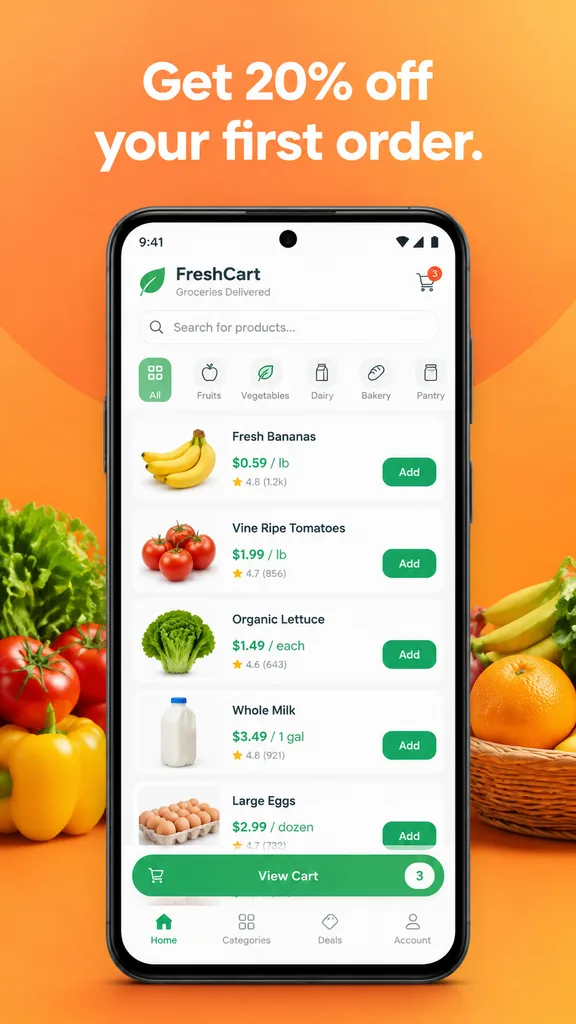 Before
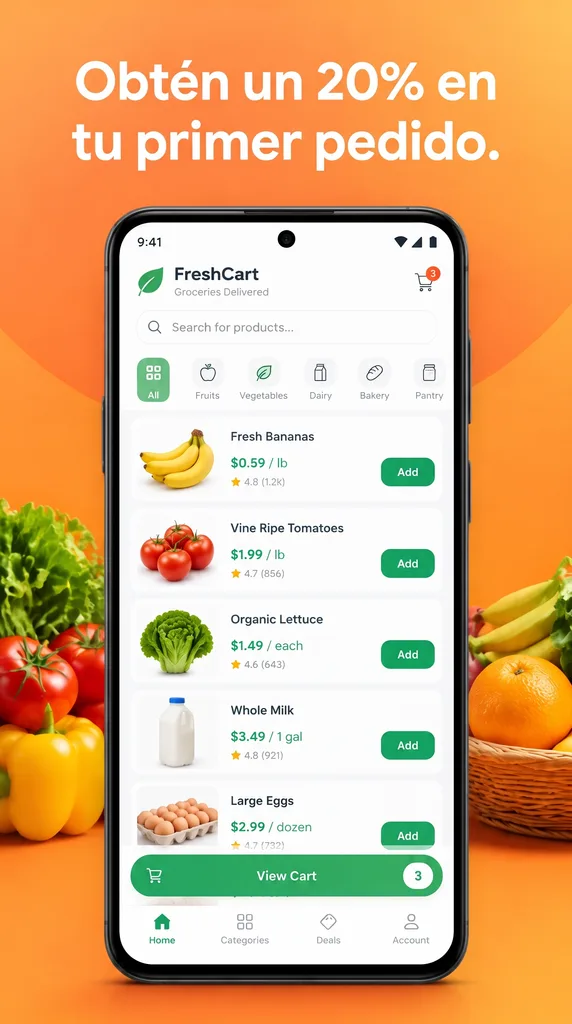 After
Localize Google Play screenshots to match — one workflow, both stores
The Android capture may have a different shape from the iOS version. Upload one screenshot, enter one visible caption and choose a supported language. Review the result and repeat for the remaining captions. Check image dimensions and content against the current requirements of each store; automatic resizing and locale folders are not provided.
What does it mean to translate App Store screenshots?
To translate App Store screenshotsis to translate a supplied caption on a finished promotional screenshot while aiming to retain its typeface, colour and position. EditText handles one phrase on one image at a time. Enter the original caption, select a supported language and review the output before downloading. Fast uses the 1K tier; a paid pack unlocks Pro at 2K. Exact source dimensions are not guaranteed, so check or resize the final image to the current store specifications before publishing. translate text in image — localize the copy, keep the design.
How to translate and localize App Store screenshots
No design file needed for one caption change. Repeat these steps separately for other phrases, images or languages, then verify each result for the relevant store:
- 1.Upload one finished screenshot. Upload one PNG, JPEG or WebP screenshot up to 10 MB. Use the sharpest source you have and keep the original for comparison.
- 2.Enter a caption and choose a language. Enter the original caption and choose one supported target language. Each generation translates one supplied phrase for 1 credit; repeat for other labels or languages.
- 3.Download the reviewed image. Download the individual image, review its wording and surrounding UI, and check its dimensions against the current store requirements. Name and organize files by locale yourself.
Frequently asked questions
Tired of localizing App Store screenshots one by one? Is there a faster way?+
You can translate an existing screenshot without rebuilding it from a design file. Upload one image, enter the phrase you want translated and choose one supported language. Review and download the result, then repeat for other captions and locales. Each generation uses 1 credit. There is no batch job, automatic locale folder or ZIP export, and the final image needs a dimension and content check before store submission.
How do I localize my App Store screenshots without redoing them each time?+
Edit a supplied caption on the finished screenshot instead of reopening the source design. The AI attempts to match the original lettering and background while translating that phrase. Compare the device frame, callouts, gradients and nearby labels with the source image before using the result. When several captions change, handle them separately and review each generation.
Do I need to localize screenshots for every language my app supports?+
Localized screenshots can help visitors understand your own app, but the effect depends on the product, audience and quality of the translation. EditText has no measured conversion results to promise. Start with the locales you can support, check wording with fluent speakers, and compare outcomes using your own store data. Consult current store documentation for localization requirements.
Will the translated screenshot still match Apple's dimension requirements?+
Exact source dimensions are not guaranteed. Fast uses the 1K tier and paid Pro uses 2K, with actual dimensions depending on aspect ratio and provider output. Check the downloaded file against the current device and store requirements and resize it where necessary. If you need exact dimensions and fully controlled text layout, export from the original design file.
How is this different from AppScreens, Screenshot Studio or a Figma plugin?+
Template and plugin tools rebuild your screenshots from a design with live text layers — you import the app UI, lay it into a frame, and export per language. That's powerful if you're designing the marketing screenshots from scratch and maintaining that source. This tool solves the opposite problem: you already have the finished screenshots (or inherited them with no source file) and just need them in more languages. You translate the pixels that exist, no template required.
Does it work for Google Play screenshots too, not just the App Store?+
Yes. Upload one Android screenshot, enter a caption and choose one supported target language. Review and download the result, then repeat for other labels or screenshots. Check the output dimensions against the current Google Play requirements before submitting it.
Does the AI translate the captions for me, or do I supply the translation?+
The AI translates everything in the screenshot — the headline, the app's UI labels, units and dates — and redraws it in the original font style. Store captions are marketing copy where tone and idiom matter, and machine translation can get them subtly wrong, so have a native speaker check each locale before you submit. If one line needs different wording, fix just that line with the single-caption editor on our translate text in image page: type the exact phrase you want and only that text changes.
What happens if the translated caption is longer than the English original?+
The AI fits the translation into the same visual block, adjusting size and letter spacing within the space the original occupied. Expansion is a real ASO constraint — German runs ~35% longer than English, French ~20% — so for tight caption bars, prefer a concise translation variant that keeps the original's visual weight. For headline captions with room to breathe, the re-rendered line adapts cleanly.
Can I batch a whole locale set, named per language for my upload workflow?+
There is no batch or ZIP export. Process one screenshot, one supplied caption and one target language per generation. Each run uses 1 credit. Download the reviewed images individually, name them for the correct locale and organize the folders yourself before using App Store Connect, Google Play Console or an upload tool.
What languages and scripts can I localize App Store screenshots into?+
The language selector supports English, Spanish, French, German, Portuguese, Simplified Chinese, Traditional Chinese, Japanese and Korean. Choose one target language per generation and supply the original phrase. Review spelling, names, numbers and line breaks with a fluent speaker before publishing; visual and translation quality vary by image and script.
Is it free to translate App Store screenshots?+
Every new account gets 1 free credit — one full-resolution localized screenshot, no watermark, no card required. Beyond that it's prepaid credits with no subscription: one credit per screenshot per language, however much text is on it. Five screenshots in five languages is 25 credits, and a failed image refunds its credit automatically. Credits don't expire, so you can localize a batch when a release ships and stop when it's done.
Is it allowed to edit and re-upload localized screenshots to the stores?+
Localizing your own app's screenshots is exactly what App Store Connect and Google Play Console localization features are for — it's standard, encouraged practice. What's not allowed here is editing screenshots you don't own or altering them to misrepresent another app. Responsibility for uploaded content sits with the uploader; see our Acceptable Use Policy. As always, keep the claims in your screenshots truthful to what the app does.
how do i edit text in a png image for free?+
You can edit text in a PNG image for free using online tools that automatically maintain the original font and style. EditText is one such tool that works efficiently without requiring a download or subscription. To start, you simply upload your PNG image to EditText, which supports files up to 10 MB. It uses generative inpainting to replace the words while preserving the background seamlessly. Unlike manually editing in software like Photoshop, which can be more complex and require font matching, the tool uses the surrounding area to intelligently guess the text style. Another option is Pixlr, a free online photo editor that also allows text editing within images, though it may require more manual input to achieve the same font and style consistency. Pixlr offers a range of tools similar to traditional desktop software and supports layers and advanced editing. After editing, ensure to save your work in the PNG format to maintain transparency, which is a notable feature of PNG files thanks to their alpha channel preservation. This ensures no loss of quality or unwanted background when the edited image is used elsewhere.
how do i edit text in a jpg image online for free?+
Editing text in a JPG image online for free is possible using tools like EditText and Photopea, which allow you to modify text without downloading any software. The tool offers an easy-to-use web interface where you can upload your JPG file, and it automatically detects and replaces text while preserving the original font, color, size, and background. This tool uses generative inpainting, a process that fills in text areas by sampling the surrounding pixels and ensuring that the edited text blends seamlessly with the existing image structure. The result is a high-quality edit without obvious signs of alteration. Photopea, on the other hand, simulates many of Photoshop’s features online, allowing for more manual control but requiring a bit more design skill to match font styles manually. The tool is more automated and outputs 2K results within about 30 to 60 seconds, making it ideal if you need quick and consistent edits. Both tools are free, but Photopea may require you to deal with ads unless you opt for a paid version. If you intend to further edit the image, consider saving it in PNG format to avoid lossy JPEG recompression artifacts.
why does text look different when i edit a png image?+
Text can look different when editing a PNG due to several factors, including subpixel rendering and the availability of system fonts. When you modify text in an image, the rendering might not replicate the original due to differences in how text is displayed on different devices and applications. Subpixel rendering is a technique that uses the individual pixels of an LCD screen to increase the apparent resolution of the text. However, this means that any change or movement of the text can lead to differences in appearance, especially when viewed at different resolutions or zoom levels. Additionally, if your editing tool uses a different font library than the one used to create the original text, discrepancies can occur. For instance, Adobe Fonts and Google Fonts have different sets of available fonts, which can lead to unexpected outcomes when the exact match isn't available. Using tools like EditText, which are specifically designed to match the original font closely, can mitigate these differences. It analyzes the image and selects the closest possible match in terms of weight, size, and style, ensuring a more seamless integration. To maintain color accuracy and text fidelity, it's important to save the edited image in a format that supports alpha channel preservation, such as PNG.
what's the best free image text editor?+
The best free image text editor depends on your specific needs, with EditText being an excellent choice for quick text edits while preserving original styles. This tool specializes in replacing text in images without altering other elements, making it ideal for those needing precise text updates. The tool works by sampling surrounding text attributes and can edit images up to 10 MB in formats such as JPG, PNG, and WebP. It provides results at 2K resolution within approximately 30 to 60 seconds. For broader image editing capabilities, consider using Canva, which includes a range of design tools and templates but might require manual adjustments to ensure text consistency with the original. Both the tool and Canva operate in-browser, negating the need for software installation and ensuring accessibility from any device, whether you're on a Mac, Windows, or even mobile platforms. Canva offers more extensive design features, which could be beneficial if you're working on complex projects or presentations. For those focused on text editing precision, the tool's automatic text style sampling provides a significant advantage in ensuring style consistency, making it a strong candidate as a specialized tool.
what's better for editing text in an image, canva or photopea?+
When deciding whether Canva or Photopea is better for editing text in an image, it depends on the complexity of the task and the style preservation required. Canva is known for its ease of use and template-based design, offering a straightforward way to add and edit text, though it might not perfectly match existing font styles on images unless the exact font is available in their library. Photopea, on the other hand, is a more advanced tool that replicates many features of Adobe Photoshop and supports complicated edits like maintaining the original font style, size, and color more precisely, provided you know the exact settings to replicate. While Canva excels in creative design and quick edits, Photopea provides greater control over manual adjustments and intricate style matching, which is essential for graphic designers familiar with layer-based editing. For quick, template-driven tasks or design creation from scratch, Canva is a strong choice. If maintaining the integrity of existing text styles within an image is crucial, Photopea may offer better fidelity. Users looking for a balance between these two might consider EditText, which simplifies maintaining original text styles in place using AI-based detection without needing advanced editing skills.
“What's the fastest way to translate App Store screenshots into multiple languages without the design source file?”
The general tool behind this page — localize any image, not just store screenshots: menus, banners, posters and signs, all with the original font and layout preserved.
Beyond translation: rename a feature, refresh a stat, or clean up the status bar on any UI capture, with system fonts (SF Pro, Roboto) matched automatically.
The ecommerce sibling: localize the text baked into Amazon listing images, Chinese supplier photos and packaging shots for a new marketplace — same engine, seller workflow.
Further reading
- Apple — App Store Connect HelpLocalize your app information↗
Apple’s official guide to localized app information and screenshots. Consult the current device and locale requirements, and check the dimensions of your downloaded image before submission.
- Google Play Console HelpAdd preview assets to showcase your app↗
Google's documentation on screenshot and graphic-asset requirements for Play Store listings across languages. Useful for matching your localized Android screenshots to Play's per-locale asset slots the same way you localize the App Store set.
- Phrase — Localization BlogApp Store Optimization & localization↗
A localization-industry overview of why screenshot and metadata localization lifts conversion in non-English markets, with the ASO benchmarks behind the 20–30% figure. Context for prioritizing which locales to localize screenshots into first.
Ready to translate your App Store screenshots?
Upload one finished screenshot, enter the original caption and choose a supported language. Review the result before submission — one free credit for new accounts, no card required.
Localize only screenshots for apps you own or manage, and keep their claims truthful. Please don’t use this tool on identity or legal documents — copyright and accuracy responsibility stays with the uploader. See our Acceptable Use Policy.